In this post we are going to explain how to configure the Electronic Reporting Destinations to convert a report to PDF, send it to the archive, send it by email, etc. You have also this video where I configure and explain it for our report used in previous videos/posts and for a Business document report in the print management destinations.
Electronic Reporting Destinations.
You can access the form from the ER workspace.
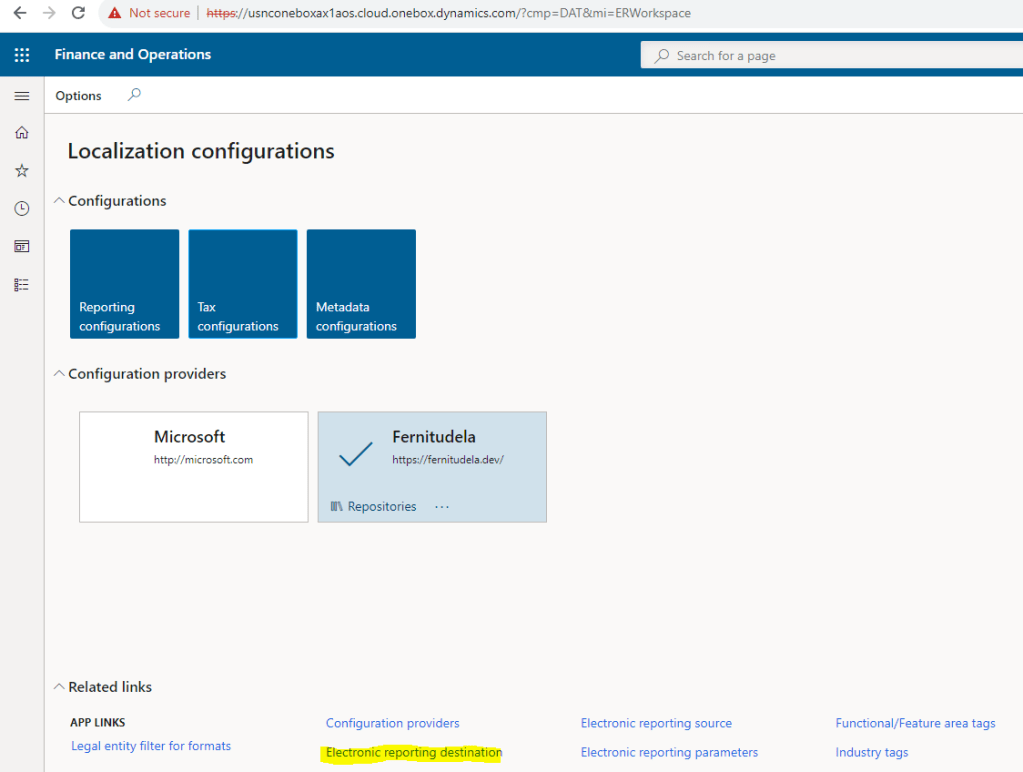
Where you will have to create a new Destination for a given format:

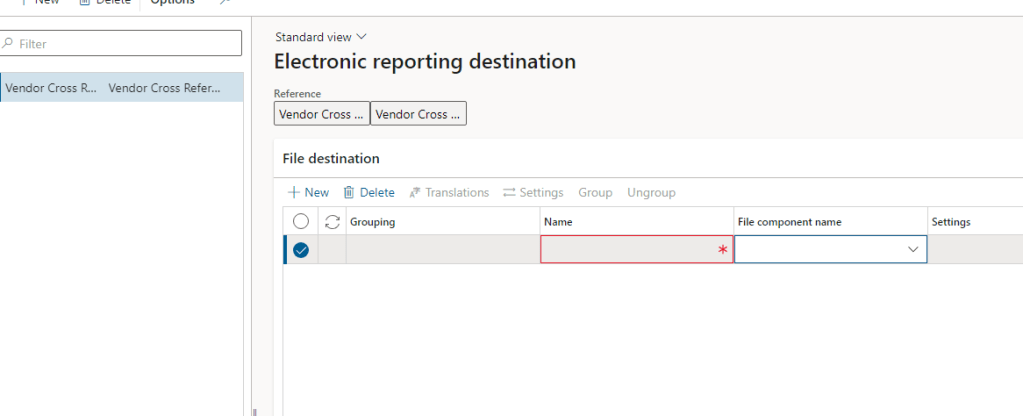
Once you create the electronic reporting destination (header) you have to set up the File destination lines (because an ER can generate many files). You will have to provide a name for the File Destination line, and select in the field File Component Name, select the name of the file node of your format that you want to set a destination for.
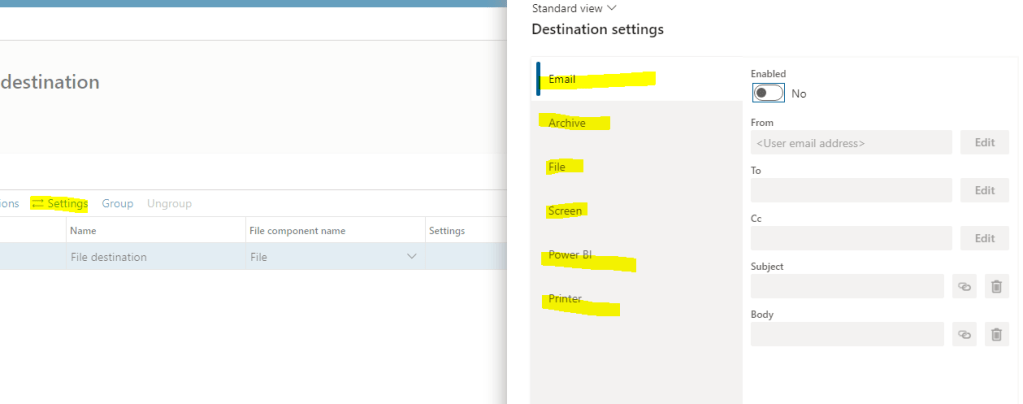
Once you have the record created, you can enable settings where you select the different destinations that you want to choose (by default) for that particular report:
Even when you select this settings here, depending on the way the ER is executed, in each execution the user will be able to modify the destination settings or not. In our solution to execute ER from code, we have a parameter “Show Destinations” for it:


Print Management Destinations
When we talk about Business documents (ER based reports that can be selected in the print management). The functionality is the same, but the place to set it up is different. If you configure the Print Management Destinations at Electronic Reporting Destination level, they are not going to be executed, you will have to do it from the Print Management.
Once you have selected you ER based Report format in the Print Management, You will have to click on the right arrow symbol at the right part of the Destination Name field:
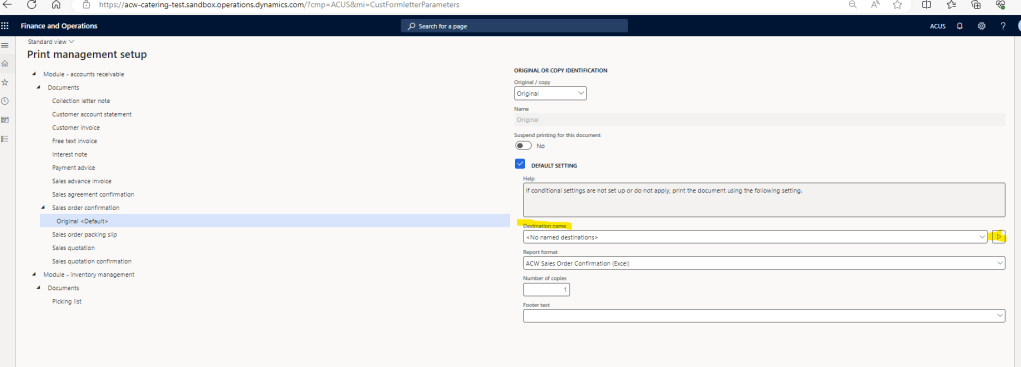
That will open the same form that we saw before but now the data is not going to be related to the ER format, but to the Print management setup node. here you can set it up the same way we did above:

Afterwards, go back to the print management setup and make sure to select the new created Electronic reporting named destination (it won’t be selected automatically):

If you don select it, it will just execute the report and do nothing, so don’t forget to do it!
Thank you and I hope you start to use this really useful and easy to implement functionality from our lovely Microsoft.
See you in other posts! If you want to learn how to create your ER or understand how to configure the Format, mappings and models, check my Electronic Reportings From Scratch Series!
Check the related Microsoft documentation: Electronic reporting (ER) destinations MS Learn

Can you let me know how you created the “Show destination” parameter? Is that pure ER or is X++ involved?
LikeLike
Hey, It is part of my x++ custom solution to execute ER from code, we have a parameter “Show Destinations” for it. There’s a link in the post, to another post where I am explaining it. here you are https://fernitudela.dev/2023/09/05/reports-with-er-sharing-my-solution-to-stop-using-ssrs-for-new-reports/
LikeLike