In this post I bring back an old collaborative video that I recorded with ERD (sorry, it is only in spanish, but if you want to see me anyway here you are the link Spanish video). I am going to put the step by step explained in english, just in case it is useful as a quick guide by itself.
What are we going to do?
We will use only one Power Automate to bring as many different approvals as we want to teams and outlook. To achieve that, and given that PA doesn’t allow us to have multiple triggers, we will use a generic HTTP trigger, keep reading if you want to know how!
Identify the BE and download schema
First of all, we need to identify the BE that we are going to use. For that, we have to go to System Administration > Business Events > Business events catalog. In our particular case we are going to use one for reviewing timesheets. Once we have found the correct one, we download the schema.
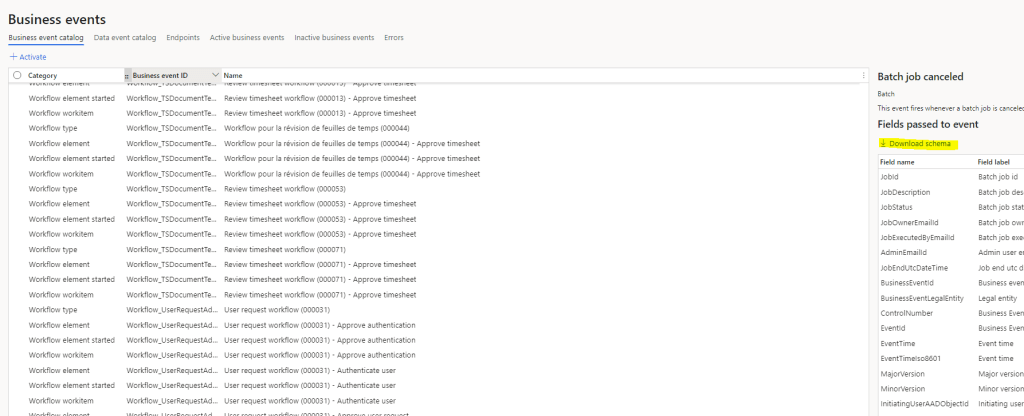
A txt file is going to be downloaded with the schema that will be used later in the Power Automate. One important note is that all the Business events of approvals share the same schema (even when there is a particular variable with specific information, the schema is the same). This is the fact that allow us to re-use only one Power Automate for as many approvals as we want.
P.Automate creation
We create a new Power Automate triggered by an HTTP request
Step 1: When a HTTP request is received

We click on “Use sample payload to generate schema” and paste the text inside the schema file we downloaded before.

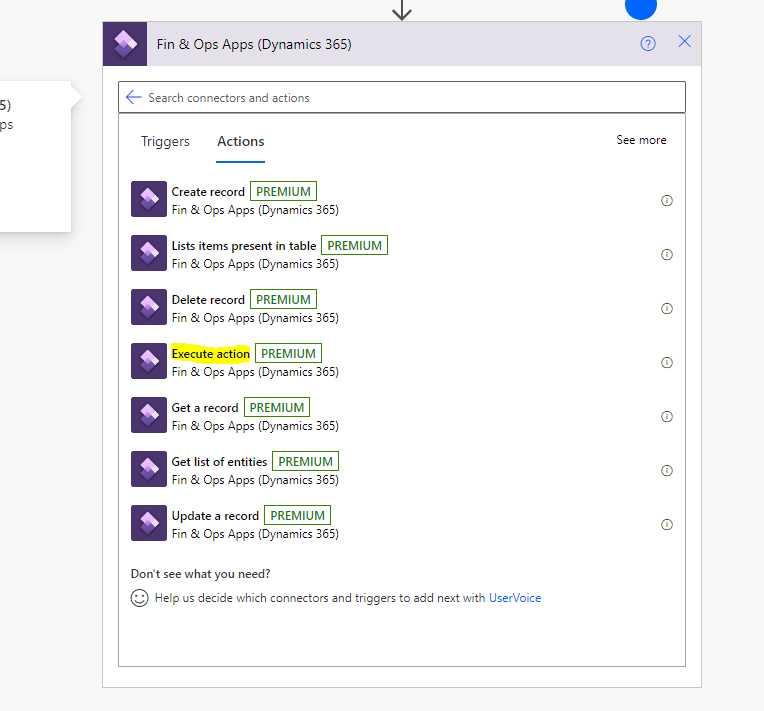
Step 2: type Execute action (Fin & Ops Apps (Dynamics 365)).
In this step we are going to validate the information received and parsed in the previous step, calling to the action WorkflowWorkItems-validate, sending as a parameter the worklowWorkItemInstanceId, that should appear automatically in the dynamic content.
Step 3: condition.
If the validation is passed, then let’s continue with our flow, else… up to you!

Step 4 Start and wait for an approval
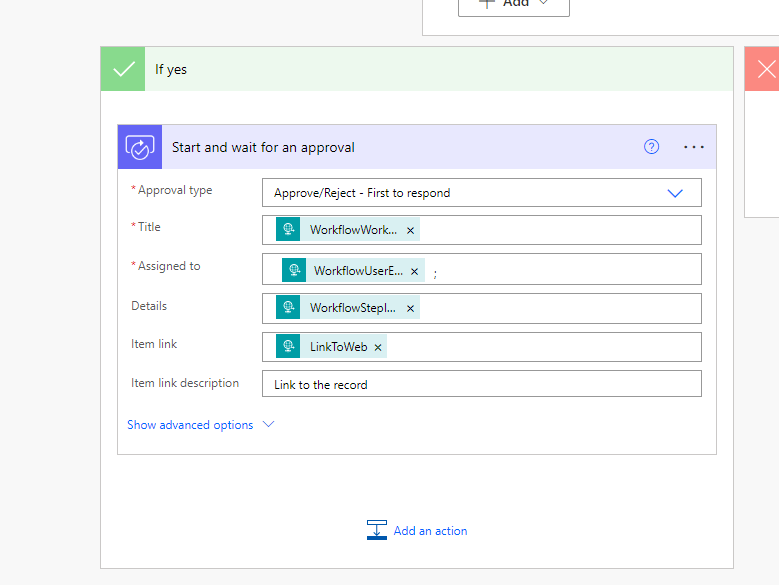
The parameters, in order, are:
- Approval type: Approve/Reject – First to respond
- Title: WorkflowWorkItemSubject
- Assigned to: WorkflowUserEmail
- Details: WorkflowStepInstruction
- Item link: LinkToWeb
- Item link description: whatever text you want to see in the link label
Step 5 Execute action (Fin & Ops Apps (Dynamics 365).
This step is exactly the same as step 2, but calling the action WorkflowWorkItems-complete instead of WorkflowWorkItems-validate. That’s it, we have completed our Power Automate, let’s see now how to configure the BEs to make them trigger it through Http request.
Azure Active Directory Applicaton
We are going to need an AAD app that has access rights to the ERP. We won’t see how to create it in this post because you probably have created many of them before, but if you don’t know or don’t remember how to do it, check this link here Create AAD App for F&O
Key Vault
Once we have the AAD app, we will need to create a Key Vault. This process is not as common, at least in my experience, for F&O Developers and, additionally, you will need a specific key vault for storing our new PA http, so we’ll go through it here:

We select a subscription, resource group, key vault name… next: Access policy, to concede access to the ERP using the AAD app, and we give access to get and list.

Click on Select principal and search by the Client Id of our AAD app.

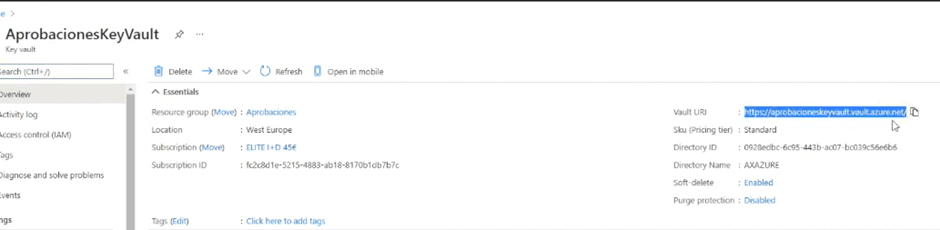
Click on add, review, create and, in a few seconds, it should be created. Let’s go now to overview and note the Vault URI, we will need it later.
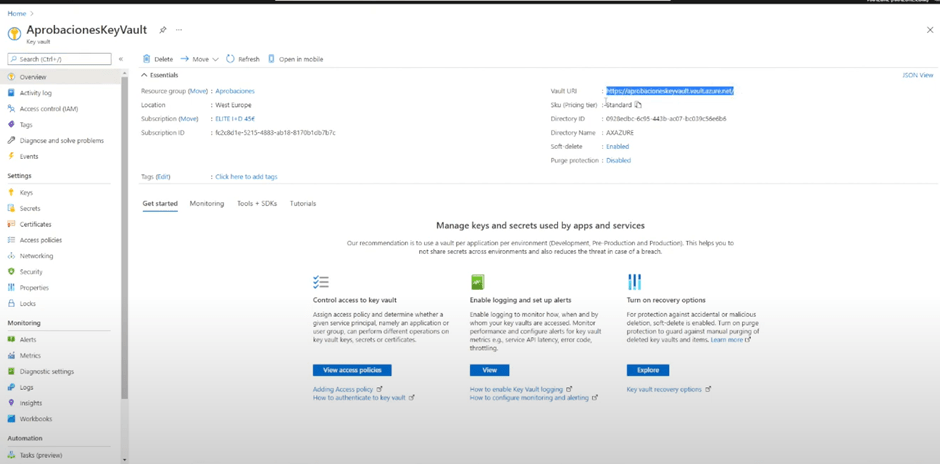
Now, only the secret is missing, let’s go then to the tab Secret, create a new secret, give it a name and provide the value, that it is the URL of the trigger of our PA.


Click on create and it’s done!
Activate the Business Event
We have now all the ingredients for our recipe, let’s go back to business event catalog in F&O, navegate to the tab Endpoints and create a new one manually. (Note that usually this step is automatically done when using Business Events from Power Automate, but as we are not using the Business Event trigger directly but a Http call instead, to make it reusable, we have to create the endpoint, and also we had to create the Key Vault).
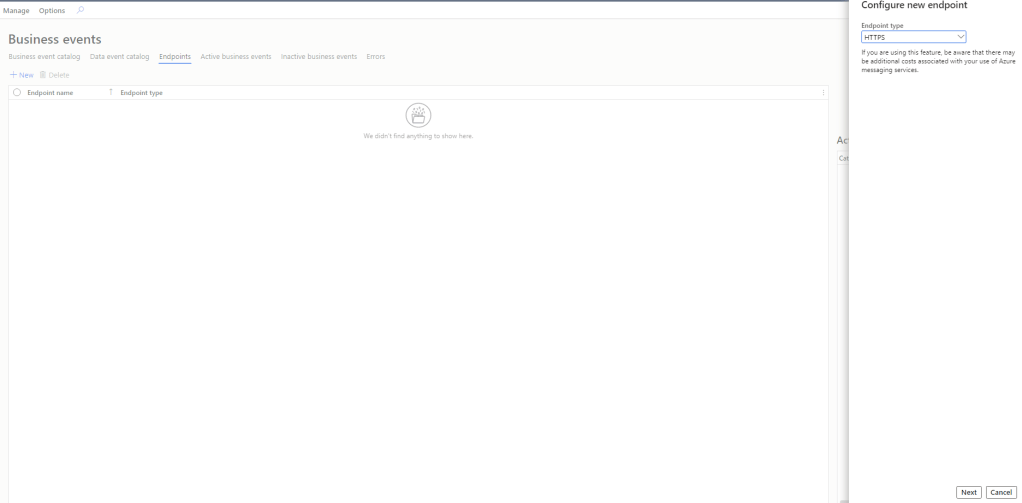
Next and fulfil the following information:
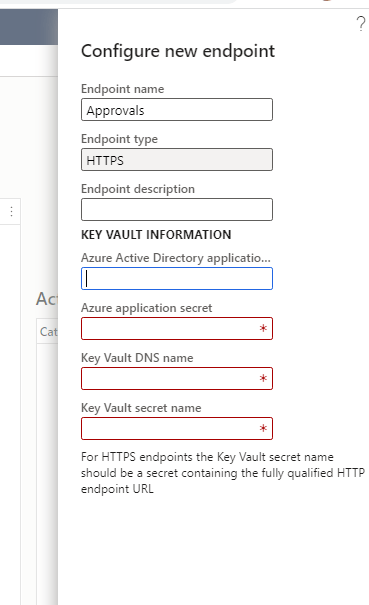
- Endpoint name: the name you want.
- Endpoint type: HTTPS
- Endpoint description: empty or whatever you want
- Azure Active Directory application Id: the client Id of our AAD app
- Azure application secret: The secret of the AAD app (that we should have saved somewhere since the moment you created it).
- Key Vault DNS Name: URL that appears in the overview of the Key vault (yeah the one I said that you were going to need).
- Key Vault Secret Name: the name of the secret that we have created in the Key vault

If we didn’t do any mistake, we will be able to accept without errors. Once we have our new endpoint, let’s go to the business event we want to activate, click on activate and select the new endpoint we have just created.
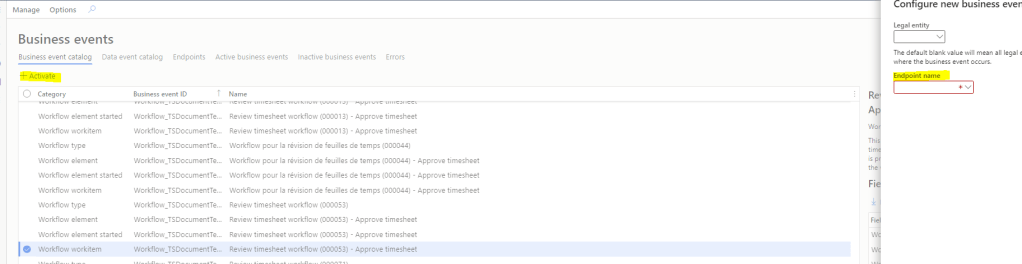
Et Voilà!!!! We can reuse this endpoint for any F&O Workflow approval, in this case it was a timesheet approval, but we can use it too, for example, for an order approval or whatever.
Let’s see it in action!
Let’s test our Power Automate Creating and submitting our timesheet and… taraaaaa (I can feel your disappointment because the snapshots are in spanish, but I didn’t want to do the whole configuration again).

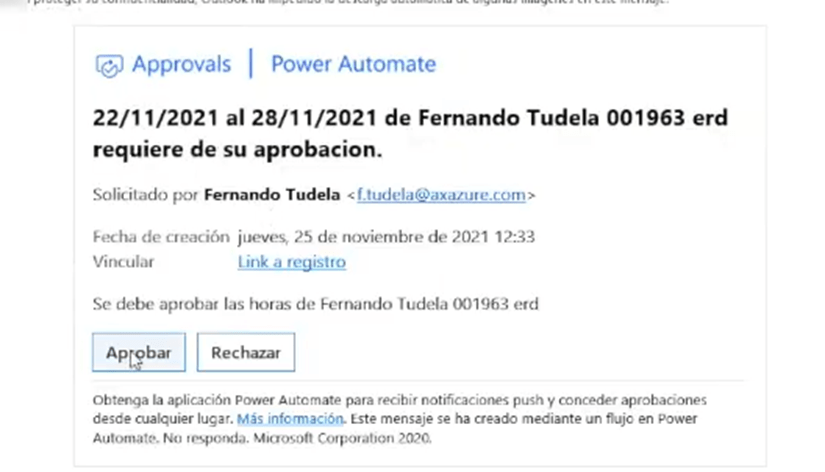
MAGIC!!! And we can approve the Workflow of F&O directly from teams or outlook.
In the video, it took me about 25 minutes to go through the whole process, that is fast!
